

The new Salesforce Integration app is still in its early stages and, in my opinion, still needs a lot of work especially when it comes to error reporting. One thing you can do, however, to make tracking Salesforce Integration errors much better is to use the Eloqua Error Routing on your Program Canvas.
Let’s take a look at an example of the below basic program which sends the contacts who meet a certain criteria to the Salesforce Integration step to create a lead and then, after the contact is successfully created into a lead, it runs an update rule to stamp a SFDC status field that shows it created the lead.
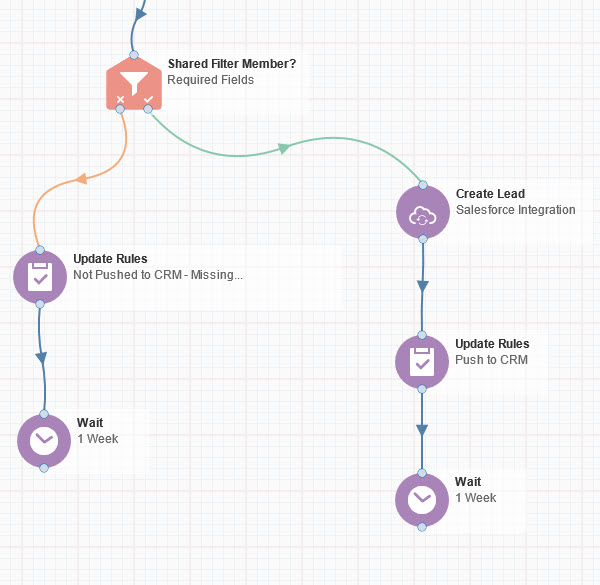
This all works great…unless there is an error thrown by the Salesforce Integration that prevents the contact from moving past the “Create Lead” step of the program. Any contact that has an error on this step would just be stuck in that step but wouldn’t it be great to automatically move those contacts to a new step and then report on the error? Well you can do that with the Eloqua Error Routing.
Eloqua Error Routing
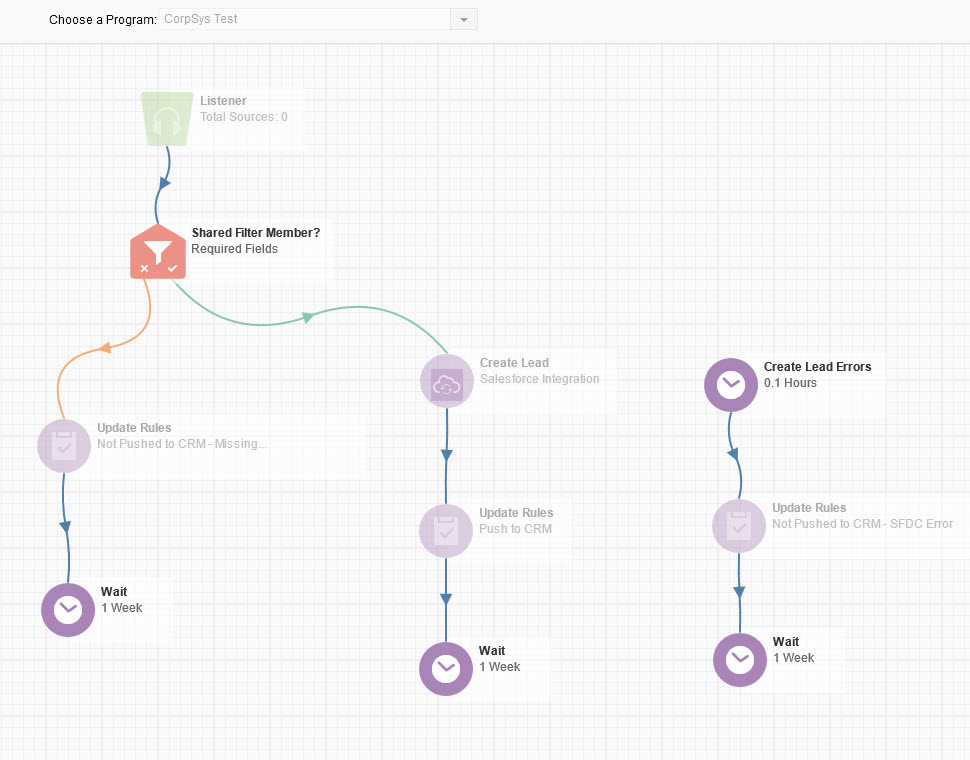
The first thing you would need to do is to add the program steps to your program canvas to catch these SFDC integration errors. In our example, shown below, we created a wait step we called “Create Lead Errors” and that goes to an update rule step that stamps the contacts with a value of “Not Pushed to CRM – SFDC Error” and then it goes to another wait step.

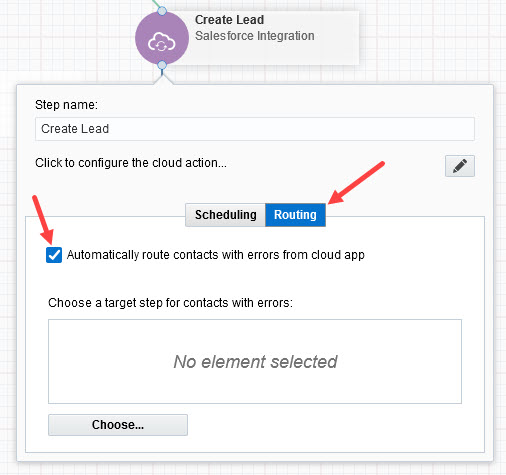
After you add those above steps, the next thing is to open the Error Routing option by simply double clicking on the Salesforce Integration Create Lead step in the program canvas and that will open the window shown below. Then just click on the Routing tab and click the box that says “Automatically route contact with errors from cloud app”.
You then click the Choose button from the above screen shot and that will open up a view of your program where you can select which step you want the Salesforce Integration errors moved to as shown below. In our example we just choose the Create Lead Errors step.
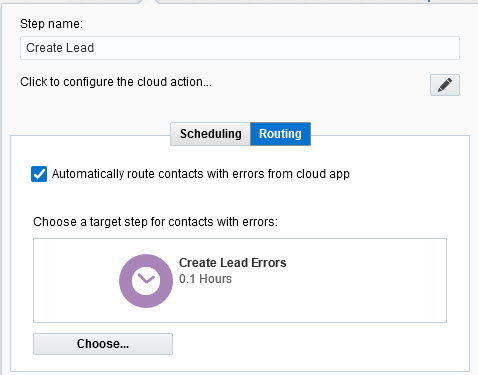
Once you select the Create Lead Errors step from above you will see the selection as shown below.
Once that is selected you are all set. From now on all the errors that occur at the Create Lead SFDC Integration step will be automatically routed to your new Create Lead Errors step and flow through those steps and those contacts will be stamped with “Not Pushed to CRM – SFDC Error”. You can use several different Error Routing steps to your program canvas on different steps to get a better picture of when contacts were not successfully pushed through to Salesforce.